In our last blogpost (see here), we covered how to create actions with parameters. We described how to create an action, how to define exececution conditions and of course, how to create action parameters. As we mentioned in our last blogpost, time cockpit auto-generates a form for each parameter entity that is used with an action. However, it is also possible to define custom forms for action parameters. For creating a customely defined form, the following steps are necessary.
- Creating a new form
- Editing the markup
- Assigning the form to a parameter entity
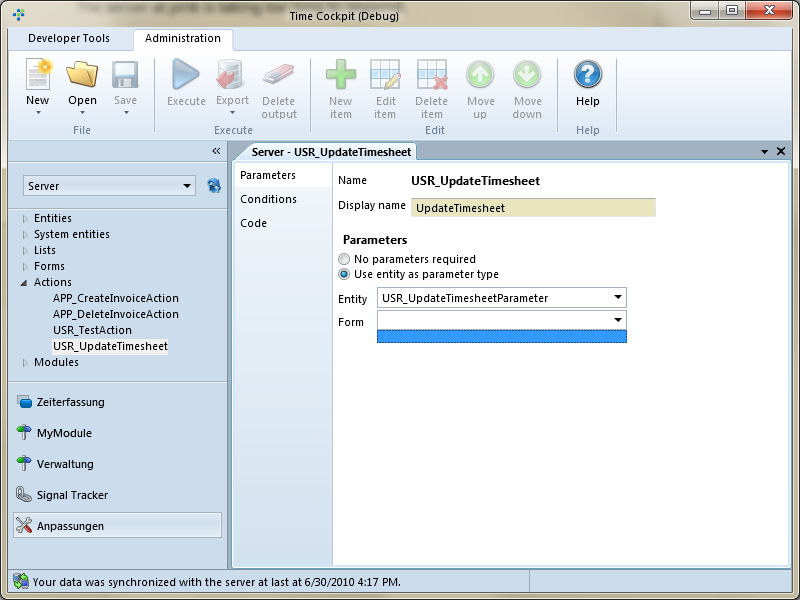
In the following, we describe the steps in more detail, but beforehand, we want to take a quick glimpse at our UpdateTimesheet action again. As you may remember, we have created an action with a parameter, but with no specific form for the parameter. As you can see in the below screenshot, the combobox for choosing a form for the UpdateTimesheetParameter entity is empty. This is because the UpdateTimesheetParameter has no corresponding form yet. We are going to change that now.
Creating a form
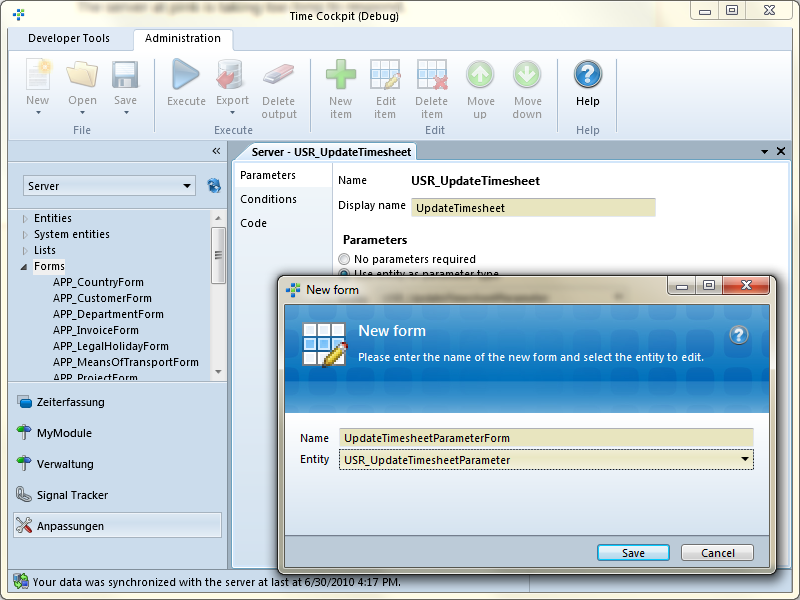
In order to create a new form, we need to switch to the "Server" context. By right-clicking on Forms, we can create a new form UpdateTimesheetParameterForm. Besides entering the name, we must assign the form to an entity. When we hit save, we are presented with a split-pane. The upper pane holds the markup of the new form, whereas the lower pane shows the graphical result of the markup. As you may have noticed, time cockpit generated default markup code representing the properties and relations of an entity, in our case UpdateTimesheetParameterForm.
Editing the markup
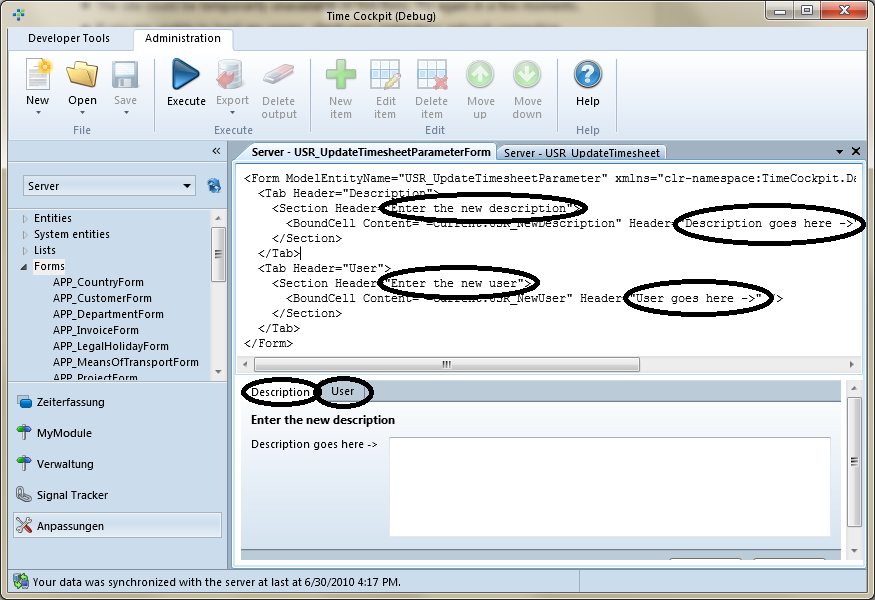
In the upper pane, we can now edit the markup as we desire. For demonstration purposes, we introduced an new Tab that is one represents the description and the other represents the user, just to show you what is possible. Further we changed a view headers to show other texts (see screenshots below). Of course, you could introduce other types of cells for other types of properties (see help). Now that we are done with editing our form, we can save the form. The lower pane now shows the graphical result of the markup. You can see that we now have a form that contains two tabs and it shows the updated texts.
Assigning the form to a parameter entity
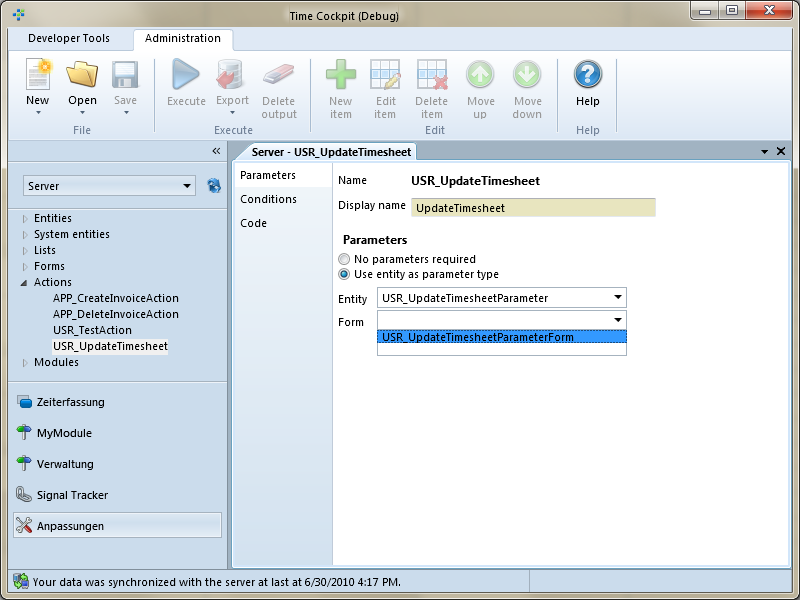
To be able to use the UpdateTimesheetParameterForm in our action, we need to reopen the UpdateTimesheet action for edit again. Please keep in mind that the reopening of the action is necessary for the changes to the model (the creation of the form) take effect. If we change to the parameter section in the edit pane of our action, we can now choose the UpdateTimesheetParameterForm from the combobox. Please mind that we can only choose from those forms, which have been created for the UpdateTimesheetParameter entity. After we have saved the action, we have replaced the auto-generated parameter dialog with our customly designed one.
When we run a query against our timesheets and call the Update Timesheet action, we can see, that time cockpit does not present us the auto-generated parameter dialog, but our customized UpdateTimesheetParameterForm.
