When we did our yearly strategy meeting at the beginning of 2014, we decided to dedicate this year primarily to moving time cockpit to HTML and JavaScript. Getting rid of XAML and Silverlight is our long-term goal.
In the long run, we want to enable our customers to use the time cockpit UI with just a browser on every device, regardless of operating system or form factor (PC, laptop, tablet, etc.).
Moving Towards Standards
This decision had huge consequences on important cornerstones of time cockpit's internal structure. The proprietary communication protocols we used in Silverlight are not appropriate for a purely browser-based solution. So we decided to move to platform- and vendor-neutral standards communication standards.
First Step: OData
As time cockpit customers, you have seen the first results our web strategy in May this year. We launched our first preview of time cockpit's OData Web API. Since then we have invested a lot of time and money to make it robust and feature-rich. One example for that is our ongoing investment in enhanced support for Service References and LINQ in Visual Studio and C#.
Although time cockpit's OData Web API is not officially in production, many customers are using it on a daily basis. Typical usage scenarios are:
- Implementing scheduled jobs for e.g. reporting, workflows, etc. (read more)
- Backend for custom time cockpit extensions
- Interfaces to/from external systems
Next Step: OpenID Connect, OAuth2

This month we are announcing the next important step in our movement towards HTML and JavaScript: We present the first public preview of time cockpit's OpenID Connect endpoint for authentication and authorization. Until now, time cockpit has used a custom token format, custom authorization flow, etc. As always we open our own APIs for our customers, too. So with the change we present today, you can use the OpenID Connect standard instead. We also published an updated version of our OData Web API that can consume the tokens you get from the new authorization endpoint.
We want to thank the team that creates and maintains the open source project Thinktecture Identity Server v3. Time cockpit's OpenID Connect endpoint is based on this library. We already started to actively participate in the project and we plan to even increase our commitment in the future.
What's Next?
Guess what's next? We are working hard to publish first early bits for our upcoming HTML client. Stay tuned, we think we are just a few weeks away.
Example: Accessing Time Cockpit's OData Web API with OpenID Connect
Introduction
A complete description of Open ID Connect is out of scope of this article. However, I would like to walk you through a short example demonstrating how you could use our new auth endpoint.
If you want to learn more about Open ID Connect and OAuth2, we recommend the following resources:
Note that in this sample I demonstrate Authentication using the Implicit Flow. If you want to play with time cockpit's new authentication endpoint, I encourage you to check out Identity Server's samples (look for the source/Clients folder for sample clients for different scenarios) on GitHub.
Step 1: Build the Request URI
Time cockpit's OpenID Connect preview endpoint currently runs at https://auth.timecockpit.com/core/. Note that this URI might change in the future. You can get time cockpit's OpenID Connect Provider Configuration at https://auth.timecockpit.com/core/.well-known/openid-configuration. In it you will find all the relevant URIs.
This is how the request URI for implicit flow would look like:
GET https://auth.timecockpit.com/core/connect/authorize?
	client_id=<your client id>&
	redirect_uri=<URI of your app>&
	response_type=id_token%20token&
	scope=openid&
	state=<yourstate>&
	nonce=<random generated nonce>
- client_id is the identifier of your client application. Note that we do not yet offer a portal that you could use to create clients. If you want to play with time cockpit's OpenID Connect endpoint, send us an email at support@timecockpit.com. We will create one for you immediately.
- id_token token in the response_type parameter will make sure that you get both an ID token (that you can optionally ignore if you just want to access time cockpit's OData Web API) and an access token (that you will need for OData).
- redirect_uri is the URI that your web app uses. You will have to tell us the URIs of your app if you ask for a client id (see previous note).
- You can read more about state and nonce here.
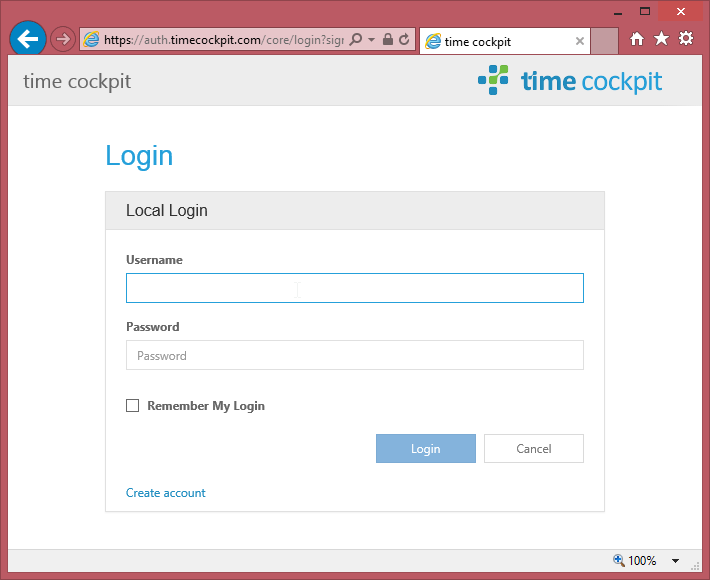
If you have built your request URI correctly, you will see time cockpit's login screen:
Step 2: Receive the Token
Once the user has successfully logged in, you will receive the tokens at the specified redirect URI. The URI parameters will look something like this:
id_token=<your id token>&
access_token=<your access token>&
token_type=Bearer&
expires_in=3600&
scope=openid&
state=<yourstate>
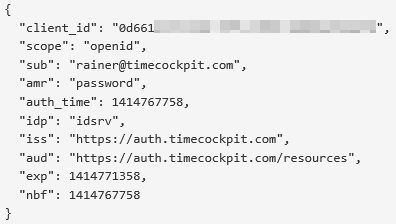
Note that you could parse and verify the tokens. You can read more in the OpenID Connect specification here. Internally, the access token looks something like this:
Step 3: Use the Token
Now that you have the token, you can use it to access time cockpit's OData Web API:

Questions? Feedback?
We want to hear what you think. If you have questions or feedback, please contact us at support@timecockpit.com.
comments powered by