In this article we show you how to work with time cockpit's Excel importer in the new HTML 5 web client. If you wonder about for how to use the importer to your advantage, take a look at the article Why an Excel Import Is Still Sexy.
Please be aware that the current version of the Excel importer does not allow to create your custom import definitions. For now, you still need the time cockpit full client for that. Read more about how to create import definitions ...
Navigate to Your Import Definitions
The following figure shows the default menu structure of time cockpit. If you don’t find the link Import Definitions in your menu structure, you most likely have customer specific adjustments in your time cockpit. Please contact your time cockpit administrator where to find the link or drop us a mail at support@timecockpit.com. We are glad to help.
If you have a standard installation of time cockpit, you should find the menu under MANAGEMENT --> Import Definitions.

Find Your Import Definition
When you click Import Definitions you will be presented with a list of all available import definitions created with the time cockpit full client. Click Import for the import definition you want to use and start the wizard that guides you through the import process.

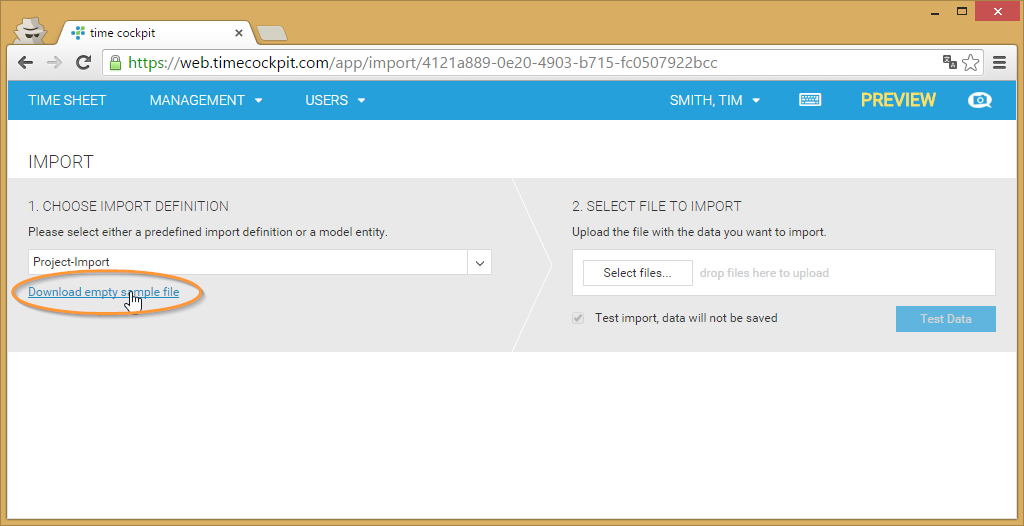
Download an Empty Sample File
In the import dialog you can still change the import definition in the drop down list. When you have decided for the correct import definition, you can click Download empty sample file. time cockpit will generate an empty sample file that bases your selected import definition. The download will save the empty template file to your hard disk.
Fill the Sample File With Data
Open the sample file that you downloaded in the previous step and fill it with data to be inserted or updated. Don’t forget to fill in the required fields. In this example ProjectCode, ProjectName, Customer, Billable and FixedPrice are mandatory (mandatory fields of Project).
Since the importer uses time cockpit's data access layer, all mandatory fields and validation rules are checked during the import. It is not possible to import records that do not conform to validation rules and mandatory fields defined in time cockpit.

Upload the File
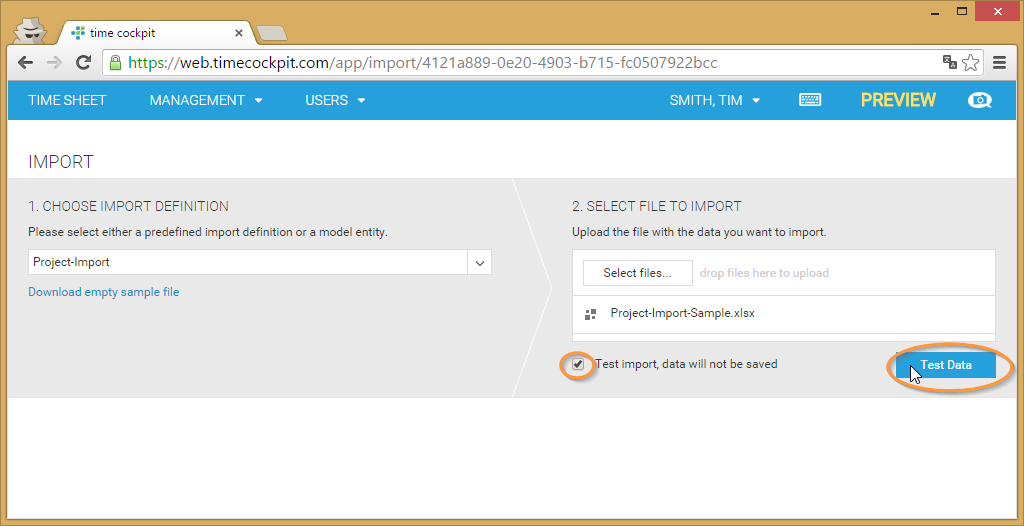
When you have finished adding/editing data in the Excel file, you can click Select files... to upload your Excel file. Alternatively, you can also drag and drop your file to the "Select files..." area.

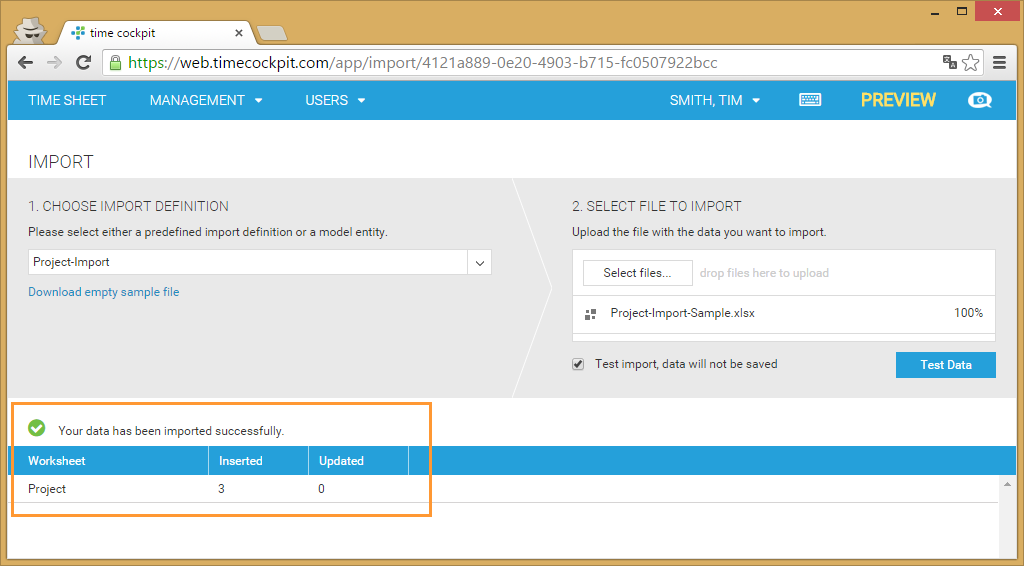
Test Your Import
Since an import usually consists of a larger amount of records, time cockpit offers you the possibility to test your import. If you activate the option Test import and click the button Test Data, your data will not be saved in time cockpit. If you don’t want to perform a test run, disable the option and start your import.
We advise you to always test your import before you perform the actual import.
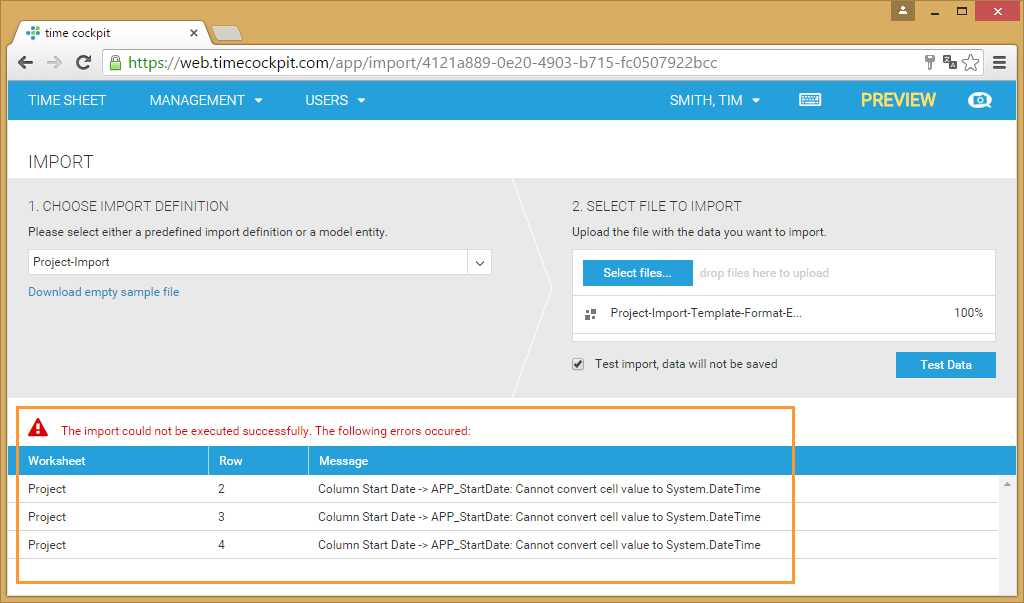
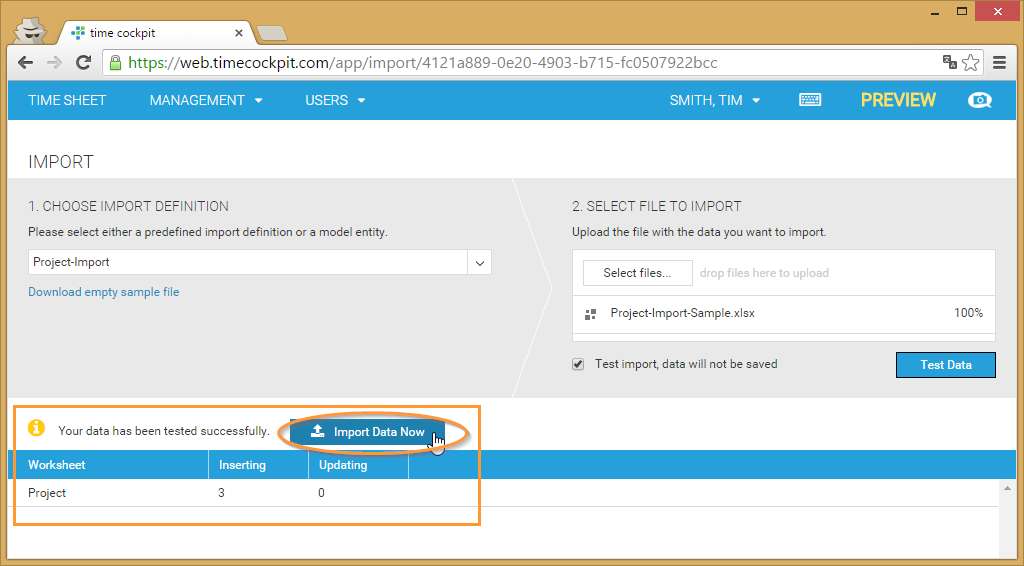
Check the results of the test import. If the test was successful start the import using the button Import Data Now. If your test import was not successful you need to go through the records in your Excel file and correct them to correspond to the rules defined in time cockpit.
The following figure shows you how time cockpit communicates errors that occurred during an import. It exactly tells you in which row and column an error occurred and what the exact error was. In most cases, you will be able to correct the error in your Excel file and retry the import until the import finishes successfully.
Import Your File
If your test import was successful, you can safely import your Excel file. Please note that if your (test) import was successful, time cockpit will show you how much records in time cockpit have been inserted and updated.
Check the Results
Check the results of the import. If the import was successful you will get the message as shown in the picture. If not you will get an error description (e.g. incorrect format or missing required fields)
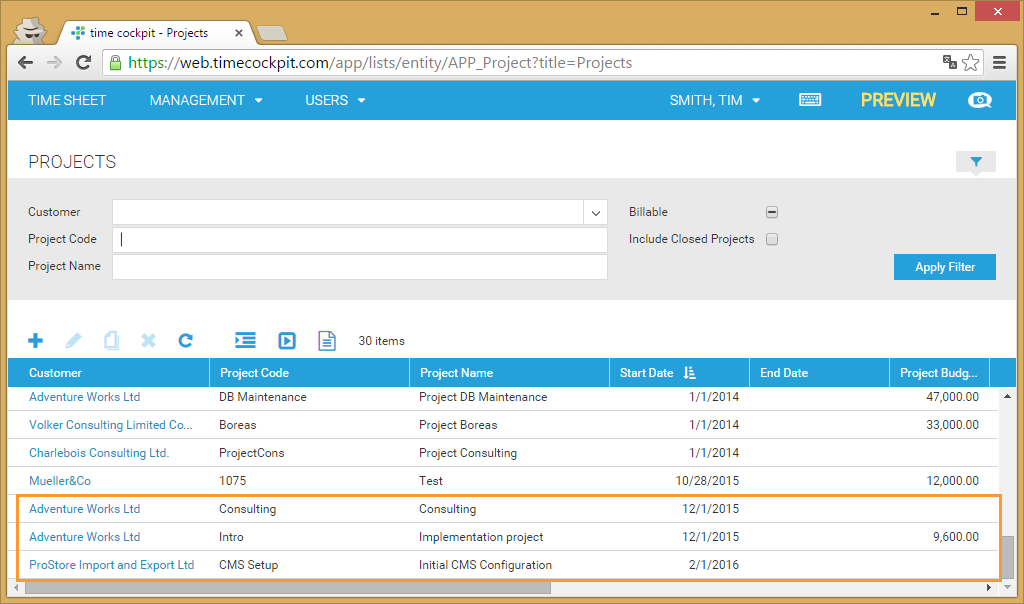
If you import was successful, you should see the records in your Excel file in the corresponding tables of time cockpit.
Further Reading
comments powered by